
By searching for contact form 1, you are probably looking for a contact form for your website. Chances are that you actually were looking for the WordPress plugin Contact Form 7.
If you were and you’re happy to use that one, feel free to go ahead. However, if you only need a quick, free contact form that you can set up and not want to worry about anymore, we might be able to help as well.
By following the steps below, you can place a link to a contact form on your website within 5 minutes for free.
Step 1: Create an Account
Please click here to start registering for an account.

Enter your information, make sure to use the email address you later want your contact form submissions to be sent to. Once you have added everything, click “Sign up”. If everything was entered correctly, you will then see the confirmation screen below:

Change over to your email inbox/app to look for the confirmation email that has been sent to you. If you can’t see the email, make sure to also check the spam folder. This should look something like this:

Click on the link and you’ll see another confirmation page that your email has been validated. On that page click on the login link.

On the login page, enter your email and password an click “Sign in”

You should now be logged into your account. Time to set up the form.
Step 2: Create a Form
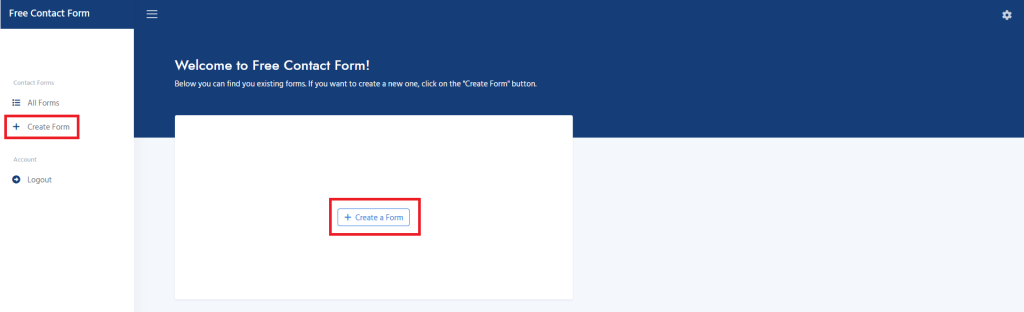
In your account, click “Create Form”, either in the left sidebar or directly on the dashboard. Both works the same way.
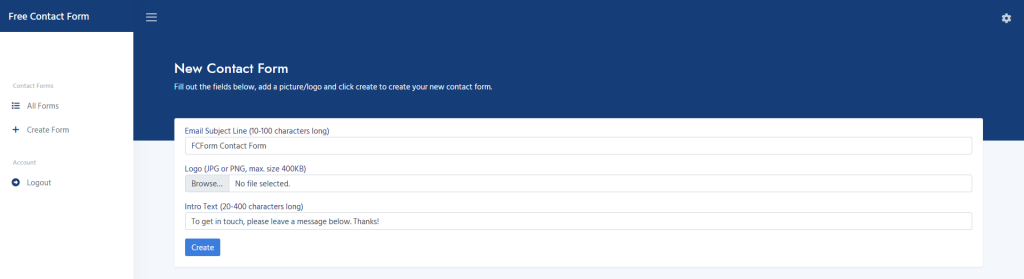
Enter all the information required. In more detail, the three input fields do the following:
- Field 1: Email Subject Line
This will be the subject line of the email we send you when somebody makes a contact form submission. - Field 2: Logo
This can be either a headshot of yourself, the logo of your brand or anything else that helps the user realize who this contact form is for. - Field 3: Intro Text
Enter some text that lets the user know what you expect them to put into the message field and what to do with the form in general.
Once you’re finished, click “Create”.
Step 3: Use the Link
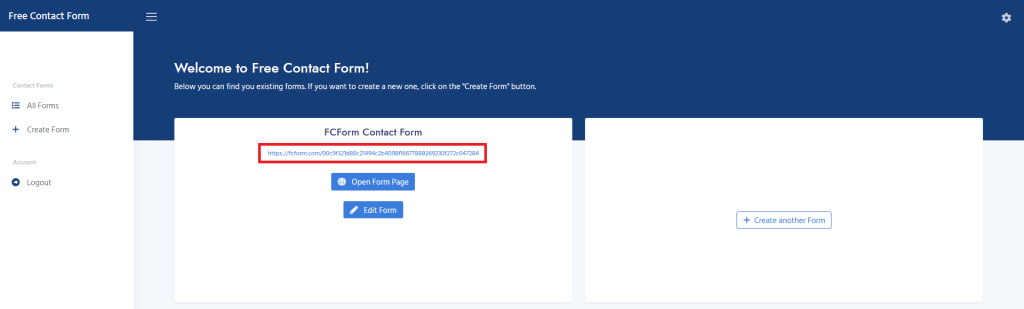
When you have finished creating and editing your form, you will see it in the dashboard. You can either click on the link as marked above or click on “Open Form Page” to get to the actual form.
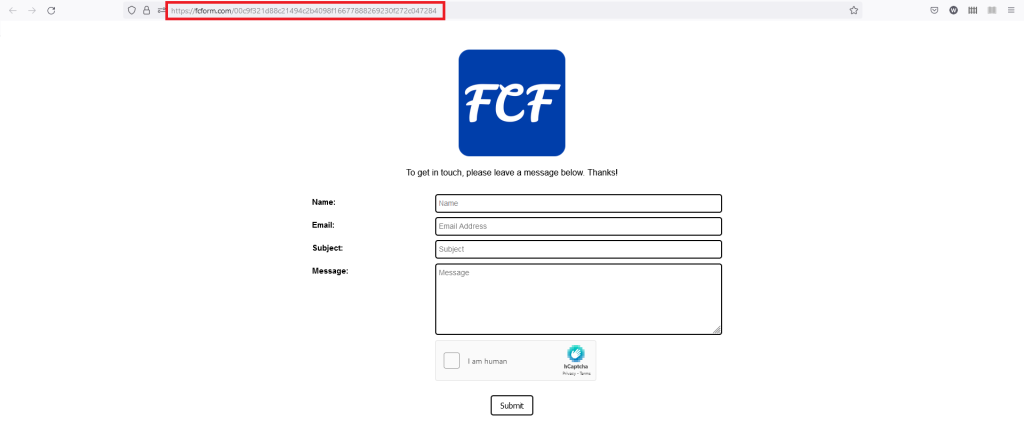
In your browser you can then copy the URL as marked above (or simply the link on the dashboard in the image before) and link to it on your website menu.
That’s it, you’re now having a contact form on your website. If you have any questions or feedback, please let me know here.